
How to Choose and Use Hot Air Without Ruining Your Epoxy
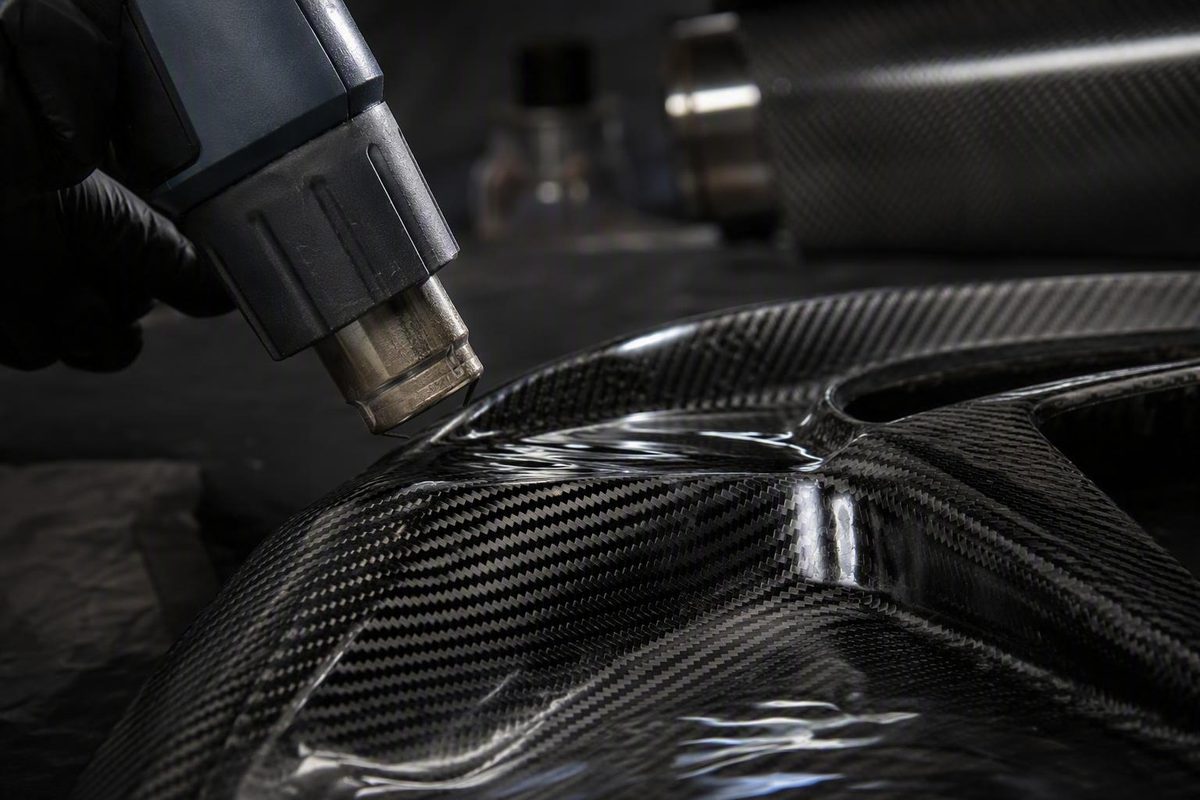
A heat gun for epoxy resin is best understood as a surface-finishing and resin-moving tool, not a universal bubble remover or curing appliance. Used conservatively, heated airflow can help release bubbles that have reached the surface, gently warm a small area, or push wet resin into waves, cells, and lacing.
The right choice is therefore not simply “the hottest gun” or even “a 350W craft gun.” Suitability depends on temperature, airflow, nozzle shape, distance, movement, exposure time, epoxy formulation, layer depth, and the materials surrounding the resin. Define the job first, then prioritize controllable low output, clear safety instructions, and a representative test piece.
Does a Heat Gun Work on Epoxy Resin?
Yes—with an important limitation. A heat gun can help with bubbles already at or very near the wet epoxy surface. It can also provide gentle surface warming and intentionally move colored resin for fluid-art effects. It is much less likely to remove air trapped well below the surface of a thick casting or deep pour.
Four commonly confused jobs need to be separated:
- Popping surface bubbles: A plausible heat-gun use because heated air reaches the exposed resin first.
- Moving resin: Airflow can push wet resin into waves, cells, lacing, and feathered transitions.
- Accelerating cure: Possible in principle, but localized heating can produce an uneven or unexpectedly fast reaction. Do not treat a heat gun as a general curing device unless the epoxy manufacturer provides a compatible process.
- Warming the workspace: A concentrated handheld tool is generally the wrong way to control the temperature of an entire room, large mold, or deep pour.
Guidance for larger pours similarly favors broader environmental heating over concentrated local heating and warns that uneven heating may contribute to warping and patchy finishes (Resin Pro’s epoxy-heating guidance).
Project-fit matrix
The following is a risk-screening matrix, not tested compatibility guidance or permission to apply heat. Confirm every material limit in the applicable resin, mold, substrate, laminate, core, coating, and tool documentation.
| Project type | Likely heat-gun role | Main limitation | Check before use |
|---|---|---|---|
| Small jewelry or molds | Surface bubbles, slight resin movement, or localized warming | Small cavities concentrate heat; molds and inclusions may distort | Resin layer limit, mold heat tolerance, inclusion compatibility, lowest tool setting |
| Tumblers | Surface bubbles and controlled movement around a curved surface | Airflow can create runs; concentrated heat may affect the coating or cup | Coating instructions, substrate, rotation method, reflector-nozzle guidance |
| Fluid art | Intentional waves, cells, lacing, and color movement | Dust and excessive airflow can muddy or displace the design | Pigment compatibility, working time, airflow control, test pattern |
| Thin surface coatings | Treatment of newly risen surface bubbles | Too much heat may create ripples, dents, yellowing, or rapid thickening | Manufacturer-approved heat method, application thickness, substrate tolerance |
| Broad tabletops | Limited surface passes or broad resin movement | Difficult to heat evenly; repeated passes accumulate heat | Approved bubble-removal method, wide-nozzle suitability, room conditions, combustible surroundings |
| Composite laminates | Very limited surface finishing, if expressly permitted | Possible damage to resin-rich areas, fibers, cores, adhesive interfaces, or cure uniformity | Resin technical data sheet, laminate process specification, tooling and core limits |
| Deep pours | At most, surface treatment after bubbles rise | Heated air cannot reliably reach trapped subsurface air without overheating the top | Maximum pour depth, mixing method, material conditioning, alternative air-removal process |
A silicone mold, sealed wood slab, painted tumbler, carbon-fiber laminate, and thick casting may all use “epoxy,” yet differ substantially in formulation, geometry, thermal mass, and surrounding materials.
Temperature setting, airflow, nozzle concentration, separation, sweep speed, and cumulative pass time all matter.
A heat gun is not universally better—or safer—than a torch. It removes the open flame but introduces strong airflow and retains ignition, burn, electrical, and overheating hazards. Tool choice must follow the epoxy system, project geometry, mold or substrate, and work environment.
How Heated Air Affects Wet Epoxy
Moderate warming may make near-surface bubbles easier to release, while the airflow physically disturbs the liquid around them. This explains why a heat gun can appear effective on a freshly coated panel yet accomplish little against a bubble suspended deep in a casting.
Repeatedly heating the top does not solve that depth problem.
Think of heat-gun exposure as a system with six interacting variables:
- Outlet temperature: The temperature of the air leaving the tool.
- Airflow: How much air reaches the work and how quickly it moves.
- Nozzle shape: Whether the stream is broad, redirected, or concentrated.
- Working distance: Greater separation generally reduces effective surface heat.
- Movement speed: A slow or stationary pass deposits more heat locally.
A reducer or round nozzle concentrates the stream. A reflector nozzle redirects air around curved work rather than aiming only at one flat point.
In fluid art, those same effects may be intentional. The difference lies in the design goal and the degree of control.
Signs of excessive or uneven heating include:
- Ripples, wrinkles, dents, or a skin-like surface
- Unexpected resin or pigment movement
- Yellowing, scorching, or smoke
- Mold distortion or substrate warping
- Patchy gloss or an uneven finish
- Unusually rapid thickening or curing
- Brittle-looking or visibly degraded areas
- Strong or unexpected fumes
ArtResin warns that prolonged heat-gun exposure can transfer excessive heat into wet resin and contribute to flash curing, wrinkles, or other imperfections. Its advice concerns its own surface-coating product and should not be generalized to every epoxy (ArtResin’s bubble-removal guidance).
Formulation, mixed volume, layer depth, mold material, substrate, pigments, fillers, embedded objects, and laminate construction can all change the outcome. The available evidence does not establish universal compatibility across coating, casting, laminating, and deep-pour epoxies.
Stop applying heat if the resin smokes, yellows, distorts, ripples, or begins thickening unusually quickly.
What to Look for in a Heat Gun for Resin Work
The most useful feature is not the highest maximum temperature. It is the ability to begin with low, repeatable heat and manageable airflow, increasing output only if the resin and tool instructions permit it.
Prioritize control
Look for:
- Adjustable or clearly separated temperature settings
- Adjustable airflow, preferably independent of temperature
- A genuinely useful low-output mode
- Controls that can be changed without losing grip or pointing the nozzle unpredictably
- Clearly documented operating temperatures and airflow values
A useful low-output mode matters because delicate molds, jewelry cavities, pigmented art, and thin coatings provide little margin for error. A high maximum temperature may add capability for unrelated shop tasks, but it does not make a tool better suited to wet epoxy.
Some heat guns can produce temperatures as high as 1,200°F, and the heating element may become red-hot during operation. Maximum output should therefore be treated as a hazard to manage, not a buying advantage for resin finishing (Princeton University’s heat-gun safety advisory).
Compact tools in the 300–500W range are commonly promoted for craft work, but that range is vendor guidance rather than a validated safety threshold (Resiners’ craft heat-gun guide). Wattage does not prove temperature accuracy, gentle airflow, safe construction, or compatibility with your epoxy.
Match airflow and nozzle to the job
- Wide or deflector nozzle: Spreads airflow across a broader area. Potentially useful for coatings, but still capable of moving wet resin.
- Reducer or round nozzle: Focuses air for detail work. It also concentrates heat and demands greater care.
- Reflector nozzle: Redirects airflow around curved work such as cylindrical forms.
- Bare outlet: May be adequate, but its pattern and concentration should be understood before use.
Nozzle names are not perfectly standardized across sellers. Inspect the actual geometry and read the tool manual rather than assuming similarly named accessories behave identically.
Consider handling and cooldown
A suitable tool should be light enough to move steadily without fatigue. Check grip comfort, switch placement, balance, and whether the cord can reach the work without crossing wet resin or creating a trip hazard. Inspect the cord and plug before every use.
A stable built-in stand or manufacturer-approved cooldown position is especially important. The nozzle can remain a burn and ignition hazard after the fan stops, so the tool must rest without rolling, tipping, or pointing toward combustible material.
Verify rather than assume safety features
Overheat protection is worth seeking, as is an electrical certification relevant to the country of use. However, a seller’s statement that a model has “overheat protection” is not independent verification. Check the product label, manual, certification database where applicable, and manufacturer documentation.
Also investigate:
- Warranty coverage and exclusions
- Return conditions
- Availability of replacement nozzles or covers
- Whether the cord or switch can be serviced
- Access to a complete manual and manufacturer support
Prices, availability, returns, and warranties change. Verify current terms on the seller’s site at the time of purchase rather than treating an archived listing as definitive.
Buyer checklist
Control
- [ ] More than one documented temperature level or true variable control
- [ ] Useful low-output setting
- [ ] Controls reachable without an unstable grip
- [ ] Settings clearly explained in the manual
Airflow
- [ ] Multiple airflow levels or variable flow
- [ ] Published airflow data, if available
- [ ] Low flow suitable for small molds and pigment work
- [ ] Inlet location unlikely to be blocked during normal holding
Handling
- [ ] Comfortable weight and balance
- [ ] Secure grip
- [ ] Adequate cord reach without relying on an extension cord
- [ ] Stable stand or approved cooldown orientation
Safety
- [ ] Relevant electrical certification can be verified
- [ ] Overheat protection is documented
- [ ] Cord, plug, housing, and strain relief appear sound
- [ ] Manual addresses clearances, ventilation, cooldown, and prohibited environments
Accessories
- [ ] Wide nozzle for broad distribution, if needed
- [ ] Focused nozzle for detail work, if needed
- [ ] Reflector nozzle for curved pieces, if needed
- [ ] Protective covers do not obstruct airflow or encourage touching a hot outlet
Documentation
- [ ] Exact model number
- [ ] Published temperature and airflow values
- [ ] Electrical requirements
- [ ] Minimum clearances
- [ ] Cleaning and storage instructions
Support
- [ ] Clear warranty and return terms
- [ ] Replacement accessories available
- [ ] Manufacturer contact information
- [ ] Service or disposal guidance
Do not select solely by marketplace ratings, purchase counts, maximum temperature, or seller promises such as rapid heating, even temperature, durability, and flawless bubble removal. None substitutes for independent performance testing.
Example Heat Guns: Documented Specifications, Not Rankings
The following products illustrate how uneven listing detail can be. They are not ranked, and none was independently tested for this article. The evidence does not identify a best heat gun for epoxy resin.
| Model | Published wattage | Temperature settings | Airflow settings | Nozzle information | Protective accessories | Return or warranty information | Important missing or conflicting data | Evidence type |
|---|---|---|---|---|---|---|---|---|
| LET’S RESIN Heat Gun for Resin | 350W | Level I: 250°C; Level II: 400°C | Level I: 150 L/min; Level II: 350 L/min | Deflector, reflector, and round nozzles named | Two silicone covers listed | Seller describes return and limited-warranty terms; verify current eligibility and conditions before purchase | Contradictory cable length; ambiguous nozzle-count wording; no supplied independent performance or safety test | Manufacturer/seller listing |
| Resiners 350W Mini Heat Gun | 350W | Two modes stated; exact values absent from the supplied marketplace evidence | Not stated | Three nozzles advertised | Silicone covers advertised | Marketplace return terms are changeable; verify the current listing | No exact temperature, airflow, certification, detailed safety instructions, or independent testing | Marketplace listing |
| UltraClear Epoxy Heat Gun | Not stated | High and low settings | Not stated | Not stated | Not stated | Not supplied in the available evidence; verify with the retailer | No wattage, exact temperatures, airflow, accessories, certification, or detailed operating parameters | Retailer product page |
The LET’S RESIN listing publishes a 350W rating, with Level I at 250°C and 150 L/min and Level II at 400°C and 350 L/min. It names deflector, reflector, and round nozzles and lists two silicone covers. Its cable information conflicts—1.5 meters versus 4.9 inches—and the nozzle-count wording is ambiguous. Fast-heating, versatility, and overheat-protection statements remain seller claims without supplied independent test results.
The Resiners marketplace listing describes a 350W mini heat gun with two temperature modes, three nozzles, and silicone covers. It markets the product for resin bubbles and other craft work, but the supplied listing does not establish exact temperatures, airflow, performance, or independently verified safety.
The UltraClear listing describes high and low settings and claims fast heating, even temperature, and durability. It does not provide wattage, exact temperatures, airflow, included accessories, certification, or warranty details, limiting meaningful technical comparison.
Marketplace ratings and small store-hosted review samples should not be used to score these tools. Customer reports can describe individual experiences, but they do not establish temperature accuracy, airflow consistency, durability, or safe use across epoxy systems.
Choose by scenario instead:
- Delicate jewelry, molds, or detailed pigment work: Prioritize a useful low mode, low controllable airflow, light handling, and an appropriate nozzle.
- Larger coated surfaces: Prioritize broad, controllable airflow and documented settings, while recognizing that a handheld tool may still heat unevenly.
- Technical or composite applications: Prioritize complete manuals, verifiable electrical certification, minimum-clearance information, and compatibility with the specified resin process—not craft branding.
A Conservative Test-Piece and Operating Workflow
There is no universal heat-gun temperature, distance, pass duration, or number of passes for epoxy. Even two vendor-authored Resiners guides differ: its craft buying guide suggests approximately 2–6 inches (Resiners’ craft heat-gun guide), while its resin-use guide recommends 6–8 inches (Resiners’ heat-gun tips). Both are commercially interested sources, and neither range is universally safe for every tool, resin, mold, or substrate.
Use this workflow instead:
-
Read all applicable instructions. Start with the epoxy technical data sheet and safety data sheet, then the heat-gun manual. Check instructions for the mold, substrate, pigments, fillers, embedded items, adhesive layers, core material, or laminate.
-
Define the exact task. Decide whether you are addressing visible surface bubbles, moving resin artistically, gently warming a small surface, or attempting broader temperature control. If the goal is to clear deep bubbles or warm an entire workspace, reconsider the tool.
-
Make a representative test piece. Match the actual batch ratio, layer depth, pigment loading, mold material, substrate, and inclusions as closely as practical. A test on clear resin in a disposable cup does not fully represent a pigmented coating over sealed wood or a composite laminate.
-
Prepare the area. Use a clean, appropriately ventilated, uncluttered work surface. Remove flammable liquids, vapors, solvents, paper, wipes, and other combustible material. Arrange the cord so it cannot cross the wet work or pull the tool over.
-
Inspect the tool. Check the cord, plug, housing, nozzle, inlet, stand, and accessories. Do not operate a damaged or wet tool. Fit accessories only as the manufacturer directs.
-
Start at the lowest heat and airflow. Do not begin on high merely to finish faster. Higher output reduces the margin between no visible effect and excessive heating.
-
Maintain separation. Never press the nozzle against the epoxy or another surface. Keep the inlet unobstructed and observe the tool maker’s minimum-clearance requirements. Distance changes effective exposure, but distance alone cannot make an unsuitable setting safe.
-
Use brief, continuous sweeps. Keep the tool moving rather than hovering over one bubble. Avoid repeatedly reversing over the same spot without allowing time for the resin to respond.
-
Wait and observe. Examine the surface in raking light for movement, rippling, color separation, yellowing, or rapid thickening. Inspect the mold and substrate as well as the resin.
-
Stop at the objective—or earlier. Once the surface bubbles are addressed, stop. Also stop immediately at displacement, distortion, unexpected fumes, yellowing, smoke, warping, or accelerated reaction. Do not continue merely because deeper bubbles remain visible.
-
Cool down safely. Place the gun on its intended stand or another manufacturer-approved cooldown position. Keep the hot outlet away from resin containers, paper, cloth, cords, and bench edges. Allow the nozzle and heated work to cool before touching, cleaning, or storage.
Record the tool, setting, nozzle, approximate separation, movement pattern, and result from the test. That record provides a project-specific starting point—not a transferable universal recipe.
Heat-Gun Safety: No Flame Does Not Mean No Ignition Risk
A heat gun can produce extreme temperatures, and its heating element may become red-hot. Its switch and fan motor are not usually spark-free, so it must not be used near flammable liquids, vapors, materials, or atmospheres.
The absence of a visible flame can create false confidence. Princeton University reports two laboratory fires involving heat guns and flammable solvents: one caused burns and destroyed a computer, while another caused more than $32,000 in damage. The advisory also warns against blocked airflow and says not to power a heat gun with an extension cord because high current draw may overheat the cord and create fire or electric-shock risks. The incidents were not reported as epoxy bubble-removal accidents, but they demonstrate the broader ignition hazard (Princeton University’s heat-gun advisory).
Fire and ignition precautions
- Remove solvents, fuels, alcohol, solvent-containing coatings, paper, wipes, and other combustibles from the area.
- Do not use the tool where flammable vapors may accumulate.
- Never assume that “no flame” means “no ignition source.”
- Keep the nozzle and hot work away from bench coverings, cords, clothing, and containers.
- Never leave a running or hot heat gun unattended.
Burn precautions
The outlet, metal nozzle, heated workpiece, mold, and nearby bench surfaces can remain hot after use. Maintain control of the tool and provide a stable cooldown location.
Wear eye protection and gloves selected for the specific resin, task, and hazards identified by the safety data sheet or workplace risk assessment.
Ventilation and fumes
Heating can increase vapor or fume release from some materials. Use ventilation appropriate to the resin, pigments, substrate, cleaning products, and workspace. The resin safety data sheet should determine formulation-specific controls; merely opening a window is not a substitute for those requirements.
If unexpected fumes or smoke appear, stop heating, move away from the exposure as appropriate, and follow the product’s safety procedures. Do not lean close to inspect the surface while directing hot air toward it.
Airflow and electrical precautions
Keep the inlet unobstructed. Never place the nozzle directly against the work because restricted airflow can overheat the tool and create a fire hazard. Follow all manufacturer clearances.
Inspect the cord and plug before use, keep the tool dry, and follow the specified voltage and power instructions. Plan the workstation around a suitable outlet rather than assuming an extension lead is acceptable.
A torch has an open flame; a heat gun does not. That distinction removes one hazard category, but a heat gun still presents ignition, electrical, burn, overheating, airflow, and fume risks. Neither tool is universally safe.
Heat Gun vs Torch, Hair Dryer, and Manual Bubble Removal
The right method depends on the resin, project, bubble location, mold, desired finish, and hazards present.
| Situation | Heat gun | Torch | Hair dryer | Pin or toothpick | Better direction |
|---|---|---|---|---|---|
| Widespread surface bubbles | Can help if permitted; adds airflow and broad heat | Concentrated flame may work for compatible surface coatings | Usually too much airflow and insufficiently concentrated heat | Too slow for many bubbles | Follow the epoxy maker’s preferred method |
| Deep bubbles | Unreliable; repeated heating risks the surface | Also primarily a surface method | Unreliable | Only if directly reachable | Improve mixing, pour depth, conditioning, or investigate vacuum/pressure processing |
| Silicone molds | Avoids direct flame but may still overheat or distort the mold | Flame may damage the mold | May displace resin | Useful for a few visible bubbles | Test low-output heated air or manual removal if approved |
| Fluid effects | Useful for waves, cells, lacing, and resin movement | Less airflow for pushing patterns | Can move resin but offers limited heat control | Not suitable for broad movement | Heat gun with controllable low airflow |
| Isolated visible bubbles | May heat more area than necessary | May heat more area than necessary | Poorly targeted | Simple and localized | Pin or toothpick |
| Broad coatings | Wide nozzle may distribute air, but uniformity remains difficult | Concentrated treatment, only if the formulation permits flame | Strong airflow may carry dust and create waves | Impractical | Manufacturer-approved tool and process |
| Flammable vapors present | Do not use | Do not use | Electrical equipment may also be unsuitable | Avoid the process until the atmosphere is controlled | Remove the hazard and follow SDS or workplace controls |
Heat gun
A heat gun can be useful for surface bubbles, limited controlled warming, silicone-mold work where direct flame could cause damage, and intentional movement of wet resin. Its drawbacks include airflow, dust, broad heating, resin displacement, and electrical or ignition hazards.
Torch
A torch delivers concentrated direct flame with less airflow across the wet resin. ArtResin recommends a propane or butane torch for surface bubbles in its own surface-coating epoxy, while identifying heat guns as useful for fluid-art movement and some silicone-mold applications (ArtResin’s method comparison). That preference is formulation-specific, not a rule for every epoxy.
A torch adds direct-flame, fuel, ignition, burn, and mold-damage hazards. If the resin manufacturer prohibits flame—or the workspace contains flammable vapors—it is not an acceptable option.
Hair dryer
A hair dryer generally supplies less concentrated heat and more airflow than a heat gun. That can push resin, disturb pigments, or deposit dust before enough useful surface heat is delivered. It should not be treated as an equivalent substitute merely because it looks similar.
Pin or toothpick
For a few isolated visible bubbles, a pin or toothpick may solve the problem without heating the whole surface. This is slow and impractical for widespread bubbling but offers precise intervention.
Straw
Blowing through a straw is inefficient and, at most, suited to a very small area.
Persistent subsurface bubbles require prevention or a different process, not escalating surface heat. The available evidence does not support a universal operating recommendation.
Prevent Bubbles First and Diagnose Problems Before Adding More Heat
Bubble control starts before the heat gun is switched on:
- Condition resin and hardener only within the manufacturer’s approved temperature range.
- Measure at the specified ratio and mix thoroughly without unnecessarily whipping in air.
- Pour deliberately and remain within the product’s stated layer or pour-depth limit.
- Seal porous wood, concrete, foam, or other air-releasing substrates when the epoxy instructions require it.
- Allow bubbles time to rise within the system’s working time.
- Use pigments, fillers, and inclusions at approved loadings.
- Control room temperature with an appropriate environmental method rather than trying to warm a large mass point by point.
Warming resin can lower viscosity in some systems and help air rise, but it may also shorten working time. For example, ArtResin recommends warming cold bottles and stirring slowly for its product while warning against excessive heat and overly thick pours. Those instructions should not be transferred unchanged to another epoxy (ArtResin’s bubble-prevention guidance).
Troubleshooting heat-gun problems
These are risk-screening possibilities rather than diagnoses.
| Symptom | Likely mechanism | Immediate response | Next-project prevention |
|---|---|---|---|
| Deep bubbles remain | Surface heat is not reaching subsurface air effectively | Stop repeated heating | Revisit mixing, approved material conditioning, pour depth, substrate sealing, and process selection |
| Ripples or displaced resin | Excessive airflow, close nozzle, concentrated nozzle, or slow movement | Stop and let the surface settle without adding more heat | Reduce airflow, improve sweep control, and use a broader nozzle if approved |
| Dust in finish | Airborne contamination carried by the heat-gun stream | Stop blowing air across the affected area | Clean the room and tool, cover nearby dust sources, and use less disruptive airflow |
| Yellowing | Excessive or concentrated heat; formulation sensitivity | Stop heating immediately | Use lower output, faster moving passes, and a representative test |
| Dents or wrinkles | Local overheating, rapid surface reaction, or airflow disturbance | Stop heating | Increase control and observation time between passes |
| Scorching or smoke | Severe overheating or nearby material damage | Switch off and follow product and workplace safety procedures | Reassess tool suitability, settings, clearances, combustibles, and ventilation |
| Rapid thickening | Heat-accelerated reaction or a large mixed mass already exotherming | Stop adding heat | Use approved batch sizes and formulation-specific temperature controls |
| Patchy or uneven cure | Localized heating may contribute; ratio, mixing, ambient temperature, or formulation may also be involved | Stop trying to correct it with spot heat | Verify ratio, mixing method, room conditions, layer depth, and uniform thermal control |
| Silicone mold distortion | Mold reached its heat or dimensional limit | Stop heating and allow safe cooldown | Verify mold limits; use lower output, more separation, or a nonthermal method |
| Substrate warping | A surrounding material tolerated less heat than the resin | Stop heating | Test the complete material stack and avoid concentrated exposure |
Do not assume every defect is caused by the heat gun. Incorrect ratio, incomplete mixing, contamination, moisture, unsuitable pigment loading, excessive pour depth, cold materials, or a strongly exothermic mixed batch can produce overlapping symptoms.
Conversely, do not assume the resin is the most heat-sensitive component.
Large pours and workspace-temperature control are fundamentally different from surface finishing. If a resin requires controlled ambient temperature, provide broad and uniform environmental control that complies with its instructions. Do not attempt to create room-scale cure conditions with concentrated passes from a heat gun.
Choose a heat gun only after defining the job. For suitable surface work, favor controllable low output, adjustable airflow, appropriate nozzles, complete safety documentation, and a stable cooldown setup. Follow the resin and tool instructions, test on representative scrap, and stop at the first sign of distortion or overheating. If bubbles remain below the surface, correct the mixing, temperature, substrate, pour depth, or trapped-air process instead of adding more localized heat.
What temperature should I set a heat gun to for epoxy resin?
There is no universal temperature. Begin with the lowest available output only after checking the epoxy technical data sheet and heat-gun manual, then validate the method on a representative test piece.
Effective exposure depends on outlet temperature, airflow, nozzle, distance, movement speed, formulation, and layer depth—not the dial setting alone. Stop if the epoxy ripples, yellows, distorts, emits unexpected fumes, smokes, or thickens unusually quickly.
How far should a heat gun be held from epoxy?
Follow the heat-gun manufacturer’s minimum clearance and the epoxy maker’s process guidance. Never touch the nozzle to the surface or obstruct the inlet.
Vendor recommendations vary from approximately 2–6 inches to 6–8 inches, demonstrating why neither figure should be treated as a universal safe distance. Tool output, nozzle design, airflow, movement, and cumulative exposure can make the same separation behave very differently.
Can a heat gun remove bubbles from deep-pour epoxy?
Not reliably. Heated air is most useful for bubbles that have reached the surface. Repeatedly heating a deep pour may overheat or prematurely thicken the upper region while leaving subsurface air in place.
For deep bubbles, investigate prevention: slower mixing, approved material conditioning, proper pour depth, sealed porous substrates, and a more suitable trapped-air-control process. Pressure or vacuum methods may be worth investigating, but they require process-specific equipment and instructions.
Is a heat gun safer than a torch for resin?
Not categorically. A heat gun has no open flame, which removes direct-flame exposure, but it can contain a red-hot element and non-spark-free electrical components. It still creates ignition, burn, electrical, overheating, airflow, and fume hazards.
A torch adds an exposed flame and fuel-related hazards and may damage molds or ignite nearby material. Select the method permitted by the epoxy manufacturer and safe for the workspace; use neither around flammable vapors.
Can I use a hair dryer instead of a heat gun on epoxy?
A hair dryer is not an equivalent substitute. It generally produces less concentrated heat and more airflow, which may move wet resin, disturb pigments, or carry dust into the finish.
If the goal is intentional fluid movement, a hair dryer’s airflow may create an effect, but it remains less controlled as a surface-bubble tool. Follow the epoxy manufacturer’s recommended method rather than substituting appliances based on appearance.