
How to Choose a Mold for Epoxy Resin
Choose silicone, sheet-built, composite, or metal epoxy molds by casting depth, cure temperature, finish, release geometry, vacuum, and production volume.
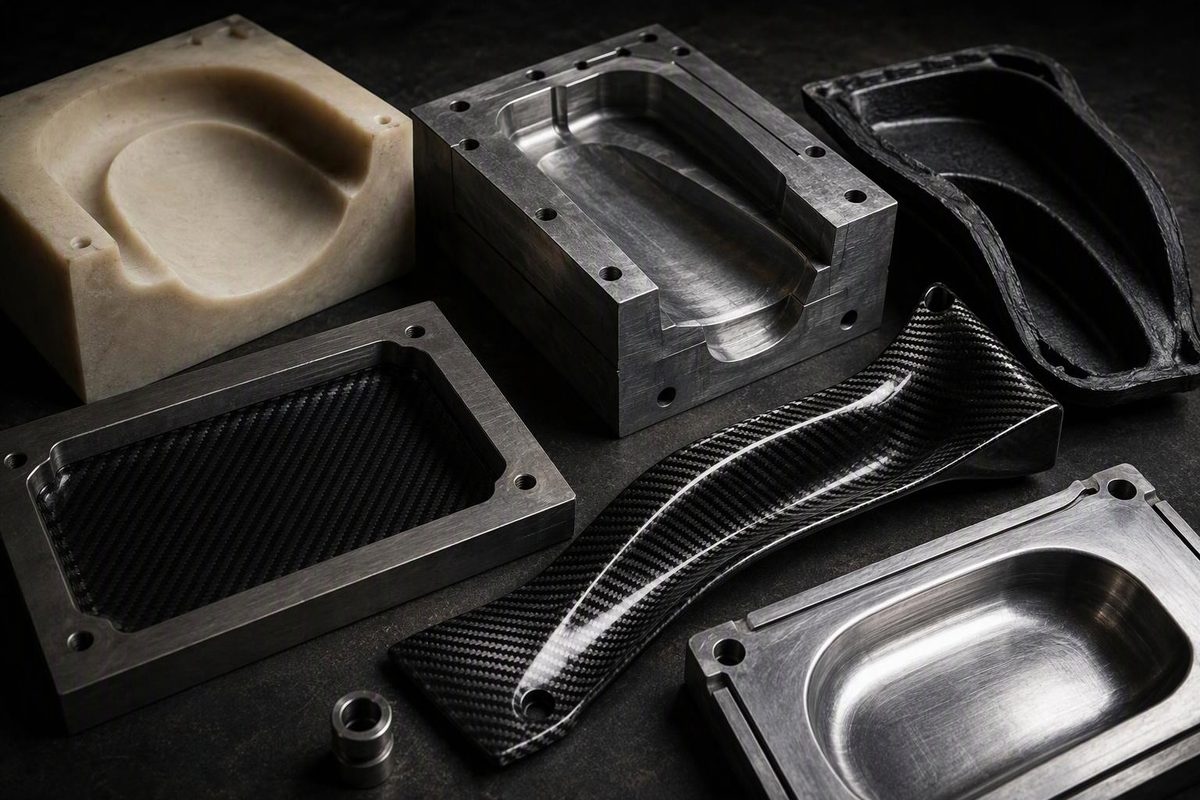
“Molds for epoxy resin” can mean two different tools: a flexible mold for casting unreinforced epoxy objects, or a rigid tool for laminating carbon fiber with epoxy. They are not interchangeable. A coaster mold only has to contain a casting resin; a carbon-fiber tool may have to hold dimensional accuracy under vacuum and through a heated cure.
Choose the mold from the process, cure temperature, part geometry, required finish and number of pulls—not simply from whether epoxy can release from its surface.
Quick selection guide
| Mold type | Best fit | Main limitation |
|---|---|---|
| Silicone rubber | Small, detailed epoxy castings and severe undercuts | Flexible, easily distorted and generally unsuitable as an unsupported precision laminate tool |
| HDPE or tape-lined sheet form | River tables, rectangular castings and one-offs | Seams must be sealed; scratches and tape joints transfer to the casting |
| Glass, melamine-faced board or sealed rigid sheet | Flat panels and simple room-temperature laminates | Limited geometry; still requires sealing where porous and a compatible release system |
| Glass-fiber/epoxy tooling | Low-volume composite parts at compatible cure temperatures | Poorer thermal-expansion match to CFRP than carbon tooling |
| Carbon-fiber/epoxy tooling | Carbon parts requiring close thermal-expansion matching and heated cycles | Higher material and fabrication cost |
| Aluminum or steel | Repeated production, heated tooling and wear-resistant surfaces | Cost, mass and thermal-expansion mismatch with CFRP |
For epoxy casting, match the mold to depth and detail
Flexible silicone is often the easiest option for jewelry, coasters and detailed decorative castings. It can peel away from undercuts that would mechanically lock a rigid mold. Polytek says its silicone mold rubbers are preferred for resin casting because release agent is generally unnecessary, but that is not a guarantee for every combination of epoxy, pigment, mold condition and finish. Test the complete material stack before a valuable pour. See Polytek’s silicone mold guidance.
For large, open castings such as table inserts, a rigid box is more stable and economical. Smooth plastic sheet, or plywood or MDF faced with compatible tape, can form the cavity. The seams need external support and a continuous seal because low-viscosity epoxy will find small gaps.
System Three’s instructions for its RiverCast resin specify plastic sheet or rigid plywood covered with packing or siding tape, with silicone caulk at the form joints. They also permit a maximum single-pour depth of 1.5 in (38 mm) at 70–80°F (21–27°C). Those limits are product-specific, but they illustrate the general rule: the resin instructions—not the mold depth—set the allowable lift.
Do not assume a large mold permits one large pour. Epoxy cure generates heat, and a thick contained mass sheds that heat poorly. WEST SYSTEM warns that an uncontrolled mass can melt plastic, burn skin or ignite nearby combustibles; it recommends shallow containment or properly timed layers to limit heat buildup. Its exotherm guidance explains the mechanism and controls. Follow the maximum depth, batch size and ambient-temperature range for the exact casting resin.
For carbon fiber, the mold is part of the process
A composite mold does more than contain resin. It establishes geometry and the mold-side surface, supports the wet laminate and may provide one airtight side of a vacuum-bag envelope. WEST SYSTEM’s vacuum-bagging manual says the surface must be airtight and smooth enough to prevent bonding. Porous wood therefore needs a sealed coating or nonporous facing. It also notes that a laminate has a smooth mold side and a rougher bag side. The manual covers mold construction, sealing and release.
That leads to three practical decisions:
- Put the important surface against the mold. A female tool normally controls the outside of a shell. A male tool controls the inside, leaving the exposed bag side to be faired or otherwise finished.
- Provide a working flange. A vacuum-bagged tool needs clean space outside the laminate for sealant tape, consumables and trim allowance.
- Make the tool stiff and airtight. A thin shell may copy the plug accurately at rest yet move during handling, vacuum, laminate springback or uneven heating. Reinforce and frame it without printing the support structure through to the working face.
For a flat room-temperature panel, glass or a properly sealed rigid table can be sufficient when used with a compatible release system. For a shaped, low-volume part, a glass-fiber/epoxy mold can be accessible and repairable. For a carbon component cured hot and held to tighter dimensions, carbon-fiber/epoxy tooling is attractive because its coefficient of thermal expansion can more closely track the part.
The Composites UK tooling guide says low-volume composite tools commonly use the same fiber as the part to match thermal expansion, and identifies carbon tooling as the best match for carbon parts. It also notes that aluminum and steel tools have a thermal-expansion mismatch with composite parts that must be managed in the tool and process design. See its comparison of composite and metal tooling.
Metal tools can suit repeated cycles and provide durable, polishable surfaces. Aluminum has higher thermal conductivity and is easier to machine; steel offers lower thermal expansion, hardness and stiffness. Neither automatically produces dimensionally accurate CFRP parts: expansion during cure and contraction during cooling can alter dimensions or affect release.
For more on matching the matrix to the manufacturing route, see Which Carbon Fiber Epoxy Fits Your Process?.
Cure temperature is a hard requirement
“Epoxy mold” does not mean “high-temperature mold.” The resin, reinforcement, surface coat, adhesive, frame, seals and release system must all tolerate the maximum actual tool temperature—not merely the oven setting or the finished part’s service temperature.
A commonly used tooling rule is to keep the tooling resin’s glass-transition temperature (Tg), or the tool’s heat-deflection temperature (HDT), at least 20°C above the maximum expected process temperature. The Composites UK guide presents that margin as a rule of thumb, not as a substitute for the tooling-system datasheet or a qualification cycle. Cure exotherm and temperature gradients also matter, particularly around thick flanges and local masses.
High-temperature epoxy tools commonly need a controlled initial cure followed by a stepped post-cure to develop their rated temperature capability. In one documented process, Easy Composites initially cures and demolds its EG160/EMP160 tool, then uses the datasheet’s stepped oven post-cure to develop properties for out-of-autoclave prepreg service. That schedule is specific to the EG160/EMP160 system; other systems require their own cure schedules.
Compare resin temperature terminology carefully using How to Choose a High Temp Epoxy Resin.
Design release into the geometry
Release agent cannot correct a mechanically locked part. Before building the tool, identify a clear pull direction and inspect every wall, return and recess from that direction.
The Composites UK guide calls a 1° draft angle an essential minimum for composite tooling and says 3° makes release significantly easier. It also warns that shrinkage or springback can consume a nominally small draft angle. If a part has an undercut, an all-around return flange or a hollow shape wider behind the opening, use a split mold, removable insert, bladder or sacrificial core rather than relying on force. Its release section explains draft, undercuts and split tooling.
Corner radius matters too. Carbon fabric can bridge a tight internal corner, leaving a resin-rich pocket instead of reinforcement following the tool. The practical radius depends on fabric architecture, ply thickness and fiber direction; a light woven surface ply can conform where a heavy unidirectional stack cannot. Design the radius around the actual layup.
Treat the surface and release system as one stack
Epoxy reproduces scratches, joints, tape overlaps and orange peel. Finish the plug to the quality required on the part, seal every porous surface and verify that the sealer, release agent, resin and cure temperature are compatible.
Paste wax, PVA and semi-permanent releases require different preparation. WEST SYSTEM describes multiple wax coats plus PVA as extra protection on a new mold, while semi-permanent systems avoid the difficult buffing associated with textured surfaces. A general-purpose aerosol may release epoxy from metal, silicone or epoxy tooling, but its residue can interfere with later work: Smooth-On requires molded parts to be cleaned thoroughly before staining, painting or bonding.
That contamination risk is important for structural carbon parts. Keep release off future bond faces where possible, use masking or a qualified release strategy, and prepare secondary-bond surfaces according to the adhesive supplier’s procedure. A clean demold is not evidence that a later adhesive joint will be reliable.
Before committing the part, make a representative coupon using the real mold surface, sealer, release system, epoxy, reinforcement, cure cycle and intended finishing or bonding operation. A small compatibility trial is cheaper than repairing a stuck part, distorted tool or contaminated bond surface.
Finally, treat uncured epoxy as a skin-exposure hazard. OSHA notes that uncured epoxy can cause irritation, dermatitis and sensitization; its composites guidance calls for safe work practices, engineering controls and suitable protective equipment. Review that guidance and follow the current safety data sheets for the resin, hardener, release agent and cleaning products.