
How to Choose and Work With 2×2 Carbon-Fiber Weave
The designation alone does not specify areal weight, fiber grade, thickness, sizing, resin, cure or completed-part strength.
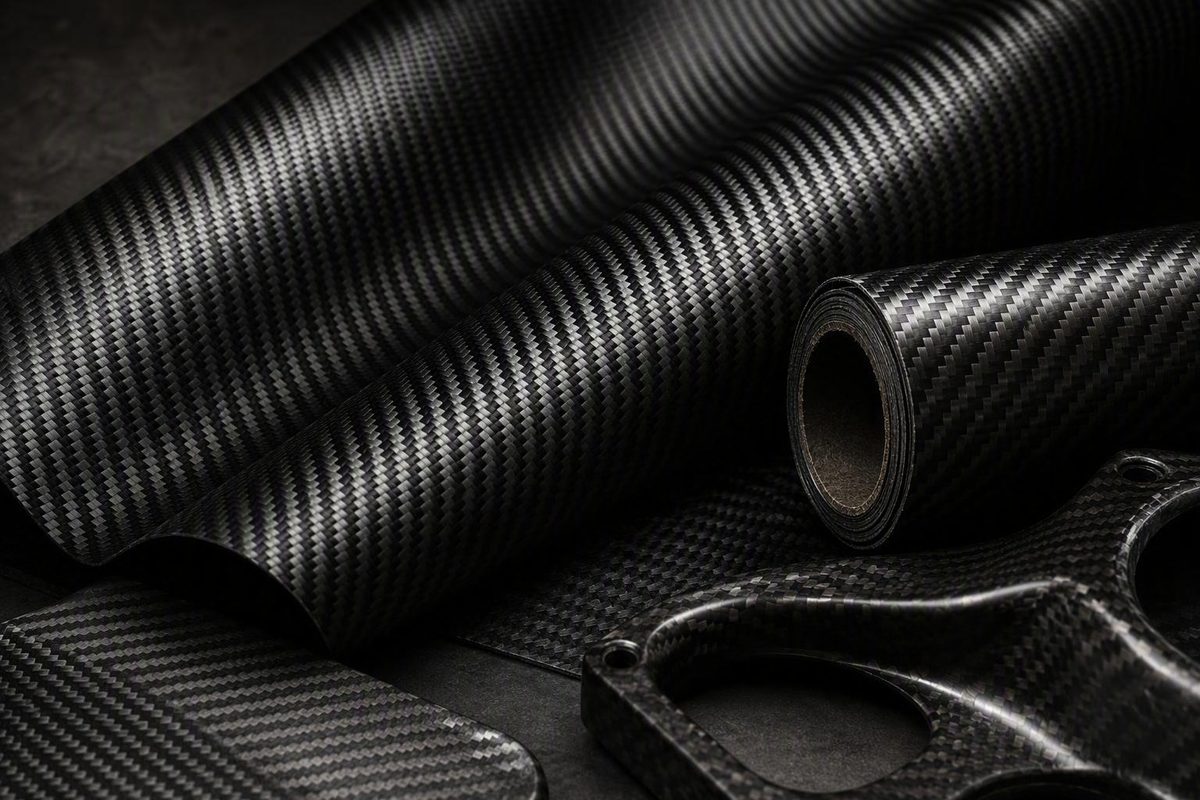
Twill carbon fiber is recognizable by its diagonal pattern, but that pattern is only one part of the material specification. It does not identify the fiber grade, fabric weight, resin, laminate thickness, manufacturing quality, or finished-part performance.
Whether you are buying dry cloth, matching a visible vehicle component, skinning a panel, repairing a laminate, or specifying reinforcement, begin with the part’s duty and geometry. Then evaluate the complete fabric specification, resin system, layup, process, and documentation. Appearance should be a requirement—not a substitute for those requirements.
What twill carbon fiber is—and what 2×2 actually means
Twill carbon fiber is a woven reinforcement made from bundles of carbon filaments called tows. “Twill” describes the weaving architecture, not a separate chemistry or grade of carbon fiber.
In a conventional 2×2 twill, also written 2/2 twill, each tow passes over two intersecting tows and then under two. The sequence shifts between adjacent rows, creating the familiar diagonal ribs. A conventional 1×1 plain weave, by comparison, alternates over one tow and under one tow to form a tighter checkerboard (Turn1’s plain-versus-twill guide).
The two principal fabric directions are:
- Warp: the tows running along the length of the roll.
- Fill or weft: the tows woven across the roll.
A conventional balanced woven cloth places reinforcement in two in-plane directions, commonly identified as 0° and 90°. Unidirectional material instead concentrates most continuous fibers along a selected direction. Neither format is automatically better: woven fabric can be convenient for bidirectional reinforcement and handling, while unidirectional material lets a designer place fiber along a defined load path.
Dry cloth is not yet a rigid carbon-fiber part. It becomes a composite when combined with a matrix—commonly a polymer resin—and cured. For broader manufacturing context, see Carbon Reference’s guide to how carbon fiber is made from precursor to finished part.
The visible pattern comes from the woven architecture, but the finished appearance also depends on:
- Tow size and pattern scale
- Alignment and local weave distortion
- Resin depth and resin-rich surface areas
- Mold and clear-coat finish
- Lighting and viewing angle
- Whether the part is viewed directly or through a clear resin surface
Twill is also a family rather than a single product. Commercial catalogs include 2×2 and 4×4 twills, conventional and V-twill patterns, spread-tow and stabilized fabrics, and biaxial or triaxial reinforcements. These names identify different architectures or presentations; they do not create a universal performance ranking.
Twill versus plain weave: appearance, drape, and stability
The practical difference between plain weave and twill begins with architecture. Plain weave interlaces each tow more frequently, producing a small checkerboard. A 2×2 twill has longer floats and a larger diagonal pattern.
| Characteristic | 1×1 plain weave | 2×2 twill |
|---|---|---|
| Visual pattern | Tight checkerboard | Pronounced diagonal ribs |
| Dry-fabric handling | Generally more resistant to shifting | More readily sheared or distorted |
| Drape | Suited to flat or moderately shaped surfaces | Commonly easier to conform over compound curves |
| Pattern sensitivity | Small pattern can make some misalignment less conspicuous | Rib direction and distortion are readily visible |
| Common selection reason | Subtle appearance or handling stability | Diagonal styling or complex contours |
These are recurring supplier and practitioner observations rather than conclusions from matched laminate testing. Twill is commonly presented as more pliable over complex contours, while plain weave is described as more stable during dry handling.
Better drape is a manufacturing advantage, not direct proof of greater strength.
Commercial comparisons also conflict. Some sellers claim plain weave is slightly stronger or stiffer; others claim twill benefits from reduced crimp; still others describe the difference as negligible for their particular products. These claims are generally not accompanied by matched laminate tests, so they do not establish a universal winner for tensile strength, stiffness, toughness, impact resistance, durability, or finished weight (SMI Composites’ weave comparison).
A valid engineering comparison would need to control:
- Fiber manufacturer and grade
- Tow size
- Areal weight or equivalent total fiber content
- Warp and fill orientation
- Ply count, sequence, and symmetry
- Resin formulation
- Cured fiber volume
- Consolidation method
- Cure conditions
- Specimen dimensions
- Voids, wrinkles, and other defects
- Conditioning and test method
Change those variables and the comparison may no longer isolate the effect of weave architecture.
A bounded selection rule is more useful:
- Choose 2×2 twill when pronounced diagonal styling or conformity over compound geometry matters.
- Consider plain weave when a smaller checkerboard or greater stability during dry handling matters.
- For a load-bearing part, select from applicable laminate-level data rather than pattern or weave name alone.
When matching an existing vehicle component, do not rely on a claim that an entire manufacturer uses one weave. Verify the exact model, component, production year, tow size, diagonal direction, pattern scale, gloss level, and surface finish.
How to read twill carbon-fiber specifications
A useful product description should say much more than “carbon fiber twill.” Each specification answers a different question.
Tow count: what 3K means
A 3K tow contains approximately 3,000 carbon filaments. The same convention makes 6K and 12K nominal descriptions for bundles of approximately 6,000 and 12,000 filaments (GS Carbotech’s tow and weave explanation).
Tow count and weave are separate specifications. “3K 2×2 twill” means that 3K tows are arranged in a two-over, two-under architecture. It does not state the complete fiber content, fiber grade, cured thickness, or finished strength.
A larger tow does not automatically make a fabric or part stronger. It can change pattern scale and fabric construction, but performance still depends on fiber properties, fiber quantity and direction, resin, laminate architecture, manufacturing quality, geometry, and loading.
Areal weight: gsm and oz/yd²
Areal weight is the mass of dry fabric per unit area. It is usually expressed in grams per square meter—g/m² or gsm—or ounces per square yard.
Useful arithmetic conversions are:
- 200 g/m² ≈ 5.90 oz/yd²
- 210 g/m² ≈ 6.19 oz/yd²
One documented product is accordingly presented as 210 g/m² and approximately 6.2 oz/yd². The same listing identifies the material as dry 3K 2×2 twill with 0°/90° orientation, a nominal thickness of 0.28 mm, and a consolidated thickness of 0.25 mm (Easy Composites’ 210 g/m² cloth specification).
Areal weight helps compare broadly similar fabrics, but only when the unit and product form are clear. An unexplained “5.7 oz” is ambiguous: it could mean oz/yd², the mass of the supplied cut, package weight, or another measure. Marketplace metadata may also conflict with the product description, so request a technical data sheet instead of inferring missing specifications from a title (example 3K 2×2 marketplace listing).
Thickness: three different values
Keep these concepts separate:
- Nominal dry-fabric thickness: an approximate measurement of unimpregnated cloth.
- Consolidated ply thickness: the expected contribution of one processed ply under stated conditions.
- Total cured-laminate thickness: the measured thickness of the complete resin-and-fiber stack after processing.
A supplier’s consolidated-ply figure is not a guarantee that every nominally similar cloth will cure to that thickness. Compaction, fiber volume, resin content, weave density, pressure, cure, and measurement method can all change the result.
Fiber grade and constituent properties
Where engineering performance matters, the carbon fiber used in the cloth should be identified. A listing may provide fiber-level tensile strength, modulus, elongation, density, and filament diameter.
Those are constituent-fiber properties. They are not guaranteed properties of:
- The dry woven fabric
- A cured single ply
- A multi-ply laminate
- A machined sheet
- A finished component
Weaving introduces architecture and crimp. Resin and fiber volume affect load transfer. Ply orientation, defects, holes, edges, joints, geometry, and loading then influence the completed part. If mechanical performance matters, request data for the actual fiber-resin system, layup, and process.
Width, orientation, and sale unit
Roll width affects nesting, seams, waste, and whether a visible component can be cut from one continuous piece. Sale units also affect price comparisons: cloth may be sold by the linear meter, square yard, roll, or precut sheet.
Orientation is equally important. A balanced 0°/90° woven cloth is not equivalent to ±45° biaxial reinforcement, 0°/+60°/−60° triaxial reinforcement, or unidirectional tape. Equal areal weight does not mean equal fiber distribution.
Before ordering, verify:
- Weave pattern and designation
- Tow count
- Areal weight and units
- Fiber manufacturer and grade
- Warp/fill or multiaxial orientation
- Yarn count or weave density, if available
- Nominal dry thickness
- Consolidated ply thickness and process basis
- Roll width and usable width
- Sale unit and supplied length
- Sizing or surface finish
- Cosmetic grade
- Certification and traceability
- Current technical data sheet
Choosing twill by use case, not by appearance alone
The useful question is not simply, “Is twill good?” It is, “What must this part do?” Four use categories help define the answer.
Cosmetic skin or veneer
A cosmetic skin places visible finish first and may cover an existing substrate rather than carry the primary loads.
Priorities include:
- Pattern scale and tow size
- Diagonal direction
- Symmetry and alignment
- Conformity over the substrate
- Surface cleanliness
- Consistency between cuts
- Compatibility with the substrate, resin, and clear finish
- Control of seams and print-through
Approximately 200–210 g/m² 3K 2×2 twill is sold by multiple suppliers as a general-purpose format. That makes it familiar and widely represented in selected catalogs, not universally optimal.
Nonstructural panel or cover
A nonstructural cover may still need adequate stiffness, dimensional stability, attachment quality, edge durability, and resistance to expected handling.
Define:
- Target thickness
- Panel span and curvature
- Support and flange geometry
- Fasteners, inserts, or bonded attachments
- Expected handling and incidental impacts
- Acceptable deflection
- Surface and backside finish
- Intended manufacturing process
Some seller guidance suggests three to six plies of lightweight twill for particular nonstructural covers. Treat that only as a product-specific starting point. A large flat panel, deeply curved housing, and small supported cover can behave very differently at the same nominal thickness.
Repair reinforcement
A repair cannot be specified from visible weave alone. Before selecting material, establish what the original component contains and what the damaged region must continue to do.
Preliminary questions include:
- Is the visible twill the primary reinforcement or only a surface ply?
- What fiber directions and reinforcement forms are present underneath?
- Does the damage extend beyond the visible area?
- What resin system and cure constraints apply?
- What loads pass through the damaged region?
- How will the repaired area be evaluated?
A matching twill patch may reproduce the appearance without reproducing the original construction. The underlying laminate may contain unidirectional, multiaxial, hybrid, or sandwich-core reinforcement.
These questions are not a repair procedure. Where failure could cause injury, substantial property damage, or loss of control, do not design the repair from general retail or tutorial guidance.
Structurally engineered laminate
In an engineered laminate, visible twill may be only the outer ply. Hidden woven, biaxial, triaxial, or unidirectional plies may carry much of the load. Different regions can also require different orientations, local reinforcement, or core material.
Seller catalogs show a broad range of conventional twill, V-twill, spread-tow, stabilized, biaxial, and triaxial products for visible components and laminates. Those catalogs demonstrate product availability, not fitness for a particular design (Composite Envisions’ twill-fabric category).
Product form matters as much as weave. Available forms include:
- Dry cloth
- Stabilized or specialty fabric
- Prepreg sheet
- Thin veneer
- Finished all-twill sheet
- Twill-faced sheet with different internal reinforcement
- Twill-finish tubes
Prepreg must be handled and cured according to its processing specification. Dry cloth leaves resin selection and processing to the fabricator.
Retail labels such as “structural,” “aerospace,” or “motorsport” are not design substantiation. For regulated, highly loaded, or safety-critical parts, use a qualified design process, appropriate material documentation, controlled manufacturing, and defined inspection rather than relying on the weave name.
Resins and fabrication methods for twill cloth
Dry twill cloth needs a compatible matrix. Suppliers commonly list epoxy, polyester, and vinyl-ester resins for particular products, while practical fabrication tutorials frequently recommend epoxy.
A generic resin-family statement is not enough. Verify:
- Fabric sizing or finish
- Exact resin and hardener
- Resin viscosity and intended process
- Mix ratio and working time
- Mold material and surface coating
- Release system
- Cure and post-cure schedule
- Secondary-bonding requirements
- Paint or clear-coat system
- Moisture, chemical, temperature, and UV environment
Mold compatibility requires its own check. One hand-lamination tutorial warns that epoxy can adhere badly to some polyester-gelcoat molds even when release agent is used. Compatibility between resin and fiber therefore does not guarantee reliable release from the tool (Easy Composites’ hand-lamination tutorial).
Process comparison
| Process | Material state | Tooling and consolidation | Repeatability and labor | Typical context |
|---|---|---|---|---|
| Wet layup | Dry cloth manually wetted with liquid resin | Open mold; brushes or rollers; atmospheric cure | Low equipment threshold but operator-sensitive | Prototypes, repairs, cosmetic work, low-volume parts |
| Vacuum-assisted wet layup | Manually wetted cloth under a sealed bag | Open mold, bagging consumables, and vacuum source | Improved consolidation potential but more setup and leak control | Low-volume laminates requiring better air removal or backside control |
| Infusion or closed-mold transfer | Dry reinforcement placed before resin enters | Sealed bag or closed mold with planned resin flow | Can improve process consistency but requires flow planning and reliable seals | Larger parts or repeated production |
| Prepreg processing | Fiber supplied with controlled resin content | Defined storage, tooling, heat, and pressure requirements | Potentially repeatable but more demanding in materials and equipment | Controlled production and performance-focused laminates |
In wet layup, dry plies are placed in or on the mold and wetted manually, usually one layer at a time. The resin must penetrate the cloth without displacing the weave or leaving dry regions.
Vacuum bagging can help remove trapped air, reduce bridging and excess resin, and improve consolidation or backside finish. The appropriate consumables and vacuum conditions depend on the resin, tooling, geometry, and finish requirements; one tutorial’s settings should not be treated as a universal prescription.
In infusion, dry reinforcement is arranged before resin moves through the stack. Cloth placement, seams, resin viscosity, flow planning, temperature, and seal integrity become important process variables.
Prepreg arrives with resin already incorporated at a controlled content. It is generally stored cold and cured according to a defined time, temperature, and pressure cycle. The material’s processing specification governs; not every prepreg requires identical equipment.
A manufacturing overview distinguishes wet layup, prepreg lamination, and resin-transfer molding and emphasizes that orientation and process influence the finished part (Formlabs’ carbon-fiber manufacturing overview).
The heat resistance of dry carbon filaments does not establish the service limit of a polymer-matrix composite.
Estimating cloth, resin, ply count, and thickness
Start with actual cut geometry rather than a generic “layers per part” rule.
For identical full-area plies:
Theoretical dry-cloth mass (g) = cut area per ply (m²) × fabric areal weight (g/m²) × number of plies
For plies with different shapes, calculate each one separately and add the results. Finished face area is not the same as purchasing area.
Include material for:
- Mold flanges and trimming
- Overlaps and prepared seams
- Orientation changes
- Pattern matching
- Compound-curve distortion
- Test pieces and process coupons
- Handling damage
- Frayed or contaminated edges
- Local reinforcement
- Process waste
Worked cloth-mass example
Suppose a cover uses six plies. Each ply has an actual cut area of 0.30 m², and the selected cloth is 210 g/m².
- Dry-cloth mass per ply: 0.30 × 210 = 63 g
- Dry-cloth mass for six plies: 63 × 6 = 378 g
The calculated requirement is therefore 378 g of dry cloth before waste. The area used for purchasing should include flanges, pattern orientation, test pieces, and expected scrap rather than only the projected face of the cover.
For some wet layups, Easy Composites suggests beginning near equal cloth and resin weights as a purchasing estimate, then adding an allowance for waste. The same seller limits its three-to-six-ply guidance to certain nonstructural covers (the supplier’s cloth and estimating guidance). Neither recommendation is a universal fiber-to-resin target or a structural design rule.
Estimating ply thickness
A supplier tutorial using six layers of 210 g/m² 3K 2×2 twill estimated a finished thickness of approximately 1.5 mm, equivalent to about 0.25 mm per ply for that project. Those values were tied to its particular hand-laminated and vacuum-bagged process (the six-ply fabrication example).
Areal weight cannot predict cured thickness exactly. Nominally similar laminates can differ because of:
- Yarn spacing and weave density
- Resin content
- Fiber volume
- Compaction
- Vacuum or press conditions
- Cure behavior
- Surface films or coatings
- Voids and resin-rich regions
- Measurement location and method
Use supplier thickness figures for preliminary planning only when their material and process basis resemble your own. Confirm critical stack thickness with representative process coupons.
For load-bearing parts, ply count, orientation, and stacking sequence must come from defined structural requirements and an appropriate validation process—not a generic online layer count.
Cutting, aligning, and seaming visible twill
That helps it follow curves but also allows the cloth to fray, shear into a skewed shape, or lose its straight diagonal pattern before resin stabilizes it.
A controlled cutting sequence
- Plan the visible orientation. Mark the intended rib direction on the pattern.
- Create the ply template. Include flanges, trim allowance, and planned seams.
- Minimize handling. Keep the cloth supported rather than repeatedly lifting or dragging it.
- Establish a straight guide. Follow a tow instead of assuming the roll edge is straight.
- Stabilize a sacrificial zone if appropriate. Keep it beyond the final trim line.
- Cut cleanly. Use sharp scissors or a rotary cutter on a suitable mat.
- Transfer the ply flat. Support large cuts so their weight does not distort the weave.
One straight-edge method is to remove a single tow carefully. The resulting channel provides a visible line along which to cut.
Another practitioner method places tape across the intended cut and cuts through the center of the tape, leaving each resulting piece with a stabilized edge. The taped area should remain outside the finished laminate and be removed during trimming. Forum participants also describe rotary cutters and light tack methods, but these are shop practices rather than validated rules for every resin or process (Talk Composites cutting discussion).
Tape, spray tack, veil, and other stabilizers introduce foreign material. Confirm that the selected product is suitable for the resin and process, minimize its use, and keep sacrificial material outside the finished area unless its inclusion has been evaluated.
Aligning the visible pattern
For a consistent appearance:
- Establish a centerline or another stable mold reference.
- Mark the intended diagonal direction on every template.
- View the pattern from the mold’s cosmetic side.
- Check both rib angle and pattern scale.
- Avoid stretching one area to correct another.
- Compare adjacent components in their installed orientation.
- Recheck alignment after corners, recesses, and flanges are seated.
On a female mold, remember that the first ply is viewed through the mold surface after demolding.
Seams, butt joints, and chevrons
Large parts or severe geometry may be impractical to cover with one undistorted piece. A practitioner demonstration shows a dry-fabric method in which a prepared edge is stabilized with thin veil and tack, the veil is kept away from the visual mold surface, and the pieces are arranged as a controlled overlap or butt joint. Opposing weave directions create a chevron or V pattern; matching directions can produce a straighter visual continuation (AJ Hartman Aero’s seam demonstration).
The visual principle is deliberate symmetry. Joining two scraps without controlling rib angle, centerline, and pattern phase usually produces an accidental-looking seam.
Overlap dimensions shown in fabrication demonstrations are process examples, not structural design values. A load-bearing seam requires design information beyond what a cosmetic seam tutorial provides.
Buying and quality-control checklist
A good purchasing decision begins with a normalized specification rather than a marketing adjective.
Pre-purchase checks
Confirm in writing:
- Exact weave: 2×2, 4×4, V-twill, or another architecture
- Tow count
- Areal weight with explicit units
- Fiber grade and manufacturer
- Warp/fill or multiaxial orientation
- Yarn count or weave density, where relevant
- Nominal and consolidated thickness
- Usable roll width
- Roll length, cut size, and sale unit
- Sizing or surface finish
- Recommended resin systems
- Cosmetic or nonvisual grade
- Certification status
- Batch or lot traceability
- Certificate-of-conformity availability
- Technical data sheet revision
- Storage and shelf-life requirements for prepreg or stabilized products
Labels such as “premium,” “first quality,” “ultimate all-rounder,” and “best-selling” are not measurable specifications. An application list likewise does not prove that a product is suitable for every listed use.
Normalize price by usable area, not advertised roll price:
Usable area = usable width × usable length, less defects and orientation-dependent waste
Then account for:
- Pattern direction and nesting efficiency
- Trim and seam allowances
- Defects or excluded edge width
- Resin and consumables
- Shipping and minimum order size
- Storage requirements for prepreg
- Certificates or lot testing
- Scrap risk on prominent cosmetic parts
Some commercial products also specify yarn count, thickness, roll width, and available lengths, illustrating why two cloths with similar titles may not be equivalent (example 3K 2×2 product specification). Contradictory metadata, unexplained ounce values, and missing fiber grades are reasons to request documentation rather than fill the gaps with assumptions.
Incoming-material inspection
Before cutting:
- Compare the label, lot, weave, width, and quantity with the order.
- Confirm that the supplied documentation matches the ordered material.
- Inspect diagonal ribs for distortion.
- Look for tow gaps, broken filaments, frayed edges, folds, and crushed areas.
- Check for dust, stains, moisture, foreign fibers, or other contamination.
- Identify blemishes before assigning cosmetic plies.
- Segregate questionable material until a decision is made.
A small known-area sample can provide a rough areal-weight check when weighed on a suitable scale. It should not be treated as certification of an entire roll.
In-process checks
During layup, monitor:
- Weave and ply orientation
- Movement around corners
- Bridging in recesses
- Wrinkles and folded tows
- Trapped air
- Dry areas
- Resin-rich regions
- Seam and overlap placement
- Contamination
- Bag leaks or incomplete consolidation
- Ply count and sequence
Photographs and a ply traveler can help distinguish multiple similar-looking woven layers and document the sequence used.
Post-cure checks
After cure and demolding, examine:
- Visible weave distortion
- Pinholes or other void indications
- Dry or porous regions
- Resin-rich areas
- Print-through and surface defects
- Edge damage or visible delamination
- Dimensions and thickness
- Bonded inserts and attachments
- Evidence that the specified cure process was completed
These checks are not a universal acceptance standard. Any acceptance criteria or inspection method must be defined for the particular material, process, and application.
Before committing expensive cloth to a prominent or complex component, make a small process coupon or visual test panel.
Frequently asked questions
Is twill carbon fiber stronger than plain weave?
Not universally. Commercial comparisons conflict, and the available supplier material does not isolate weave architecture under matched laminate conditions.
Finished performance depends on fiber grade, fiber quantity, orientation, ply sequence, resin, fiber volume, consolidation, cure, defects, geometry, and loading. Twill may be easier to drape over compound curves, while plain weave may remain more stable during dry handling. Those are useful fabrication distinctions, not proof that either weave always produces a stronger, stiffer, tougher, or lighter part.
What does 3K 2×2 twill carbon fiber mean?
3K means that each tow contains approximately 3,000 carbon filaments. 2×2 twill means that each tow passes over two intersecting tows and then under two, with the shifted sequence creating diagonal ribs.
The designation does not specify areal weight, fiber grade, thickness, sizing, resin, cure, or completed-part strength. Those specifications must be checked separately.
Which resin should be used with twill carbon-fiber cloth?
Epoxy is frequently recommended for carbon-fiber fabrication, while suppliers also list polyester and vinyl ester as compatible with particular dry twill fabrics.
The correct choice depends on the exact fabric sizing, resin formulation, process, mold surface, release system, cure schedule, coating, and service environment. Use the resin and fabric technical data together rather than assuming that broad compatibility with a resin family guarantees compatibility with every formulation or tool.
How many layers of 200–210 g/m² twill carbon fiber are needed?
There is no universal number. Seller guidance of three to six plies applies to certain nonstructural covers, and the cited six-ply tutorial’s approximately 1.5 mm result was specific to its material and process.
For cosmetic or nonstructural work, determine ply count from target thickness, stiffness, geometry, attachments, and representative trials. For load-bearing parts, the count, orientation, and sequence require application-specific design and validation.
Can twill carbon fiber be cut with ordinary scissors?
Yes. A supplier tutorial demonstrates cutting lightweight dry carbon cloth with ordinary household scissors, while suggesting specialist shears for frequent use.
Support the cloth, minimize handling, align the cut with the weave, and use sharp tools. Removing one tow can create a straight guide. A taped sacrificial edge can also reduce fraying, provided the tape remains outside the final trimmed laminate and is suitable for the process.
Final selection sequence
Choose twill carbon fiber in this order:
- Duty: Decide whether the part is cosmetic, nonstructural, repair-related, or load-bearing.
- Geometry: Determine the required drape, seam control, and pattern alignment.
- Process and resin: Confirm that the cloth can be processed repeatably with the intended matrix, mold, cure, and equipment.
- Documentation: Verify fiber grade, sizing, technical data, traceability, and any application-specific documentation.
- Appearance: Select the tow size, diagonal direction, pattern scale, and finish.
Twill is often a practical choice when diagonal styling and conformity matter. It is not a universal recommendation. For structural or safety-critical work, rely on qualified design, suitable material data, controlled processing, and defined inspection—not the weave name, a retail label, or a generic ply count.